How to use Ableton Live 12's MIDI Tools: Rhythm, Seed, Stacks
How to use Ableton Live 12's MIDI Tools to create melodies, chords, and beats
(even if you don't know music theory)
(This post was created with materials from the Ableton Live Manual online)
In order to transform or generate notes using a MIDI Tool, open the Transform or Generate tab/panel in a Clip, select a tool from the Transformation/Generator Selector drop-down menu and tweak the settings in the chosen MIDI Tool’s interface.
By default, the Auto Apply button labeled as “Transform” for Transformations and as “Generate” for Generators, is active for all MIDI Tools. This means that MIDI notes will be transformed or generated immediately when adjusting a MIDI Tool’s settings.

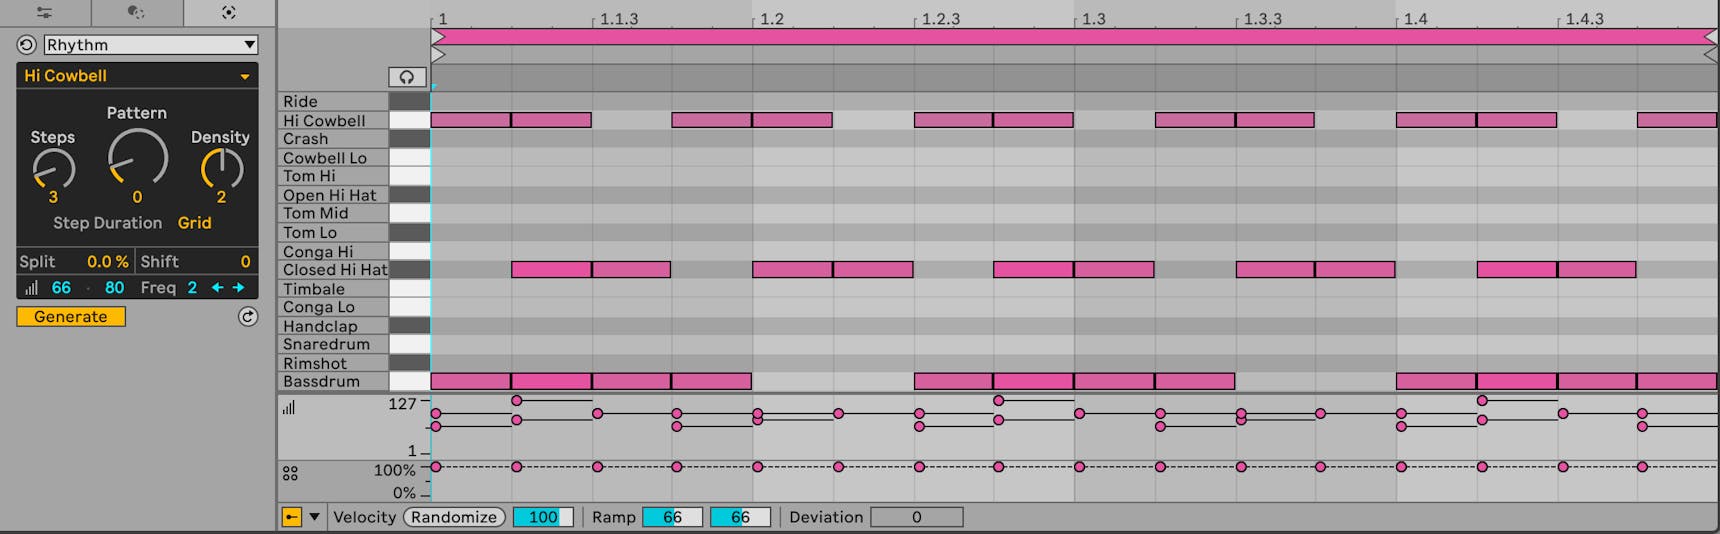
Rhythm
The Rhythm MIDI Tool generates a note pattern according to the set parameters, repeated to fill a given time selection.
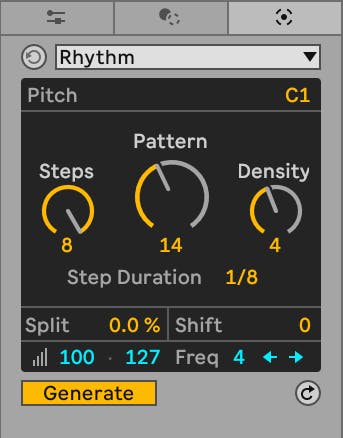
The notes can be generated for a particular pitch or for an individual drum pad when working with Drum Racks. You can choose a pitch or a drum pad using the Pitch control, or by holding the Alt (Win) / Option (Mac) key and clicking on the piano ruler.
Use the Steps control to set the number of steps in the pattern, up to 16 steps.
The Pattern knob is used to determine the placement of the generated notes (the shape of the pattern). The number of available patterns depends on the values set for the Steps and Density parameters.
The Density knob controls the number of notes in a pattern. Note that the maximum value is determined by the number set in the Steps control.
The Step Duration slider can be used to adjust the number of times a pattern is repeated in the time selection.
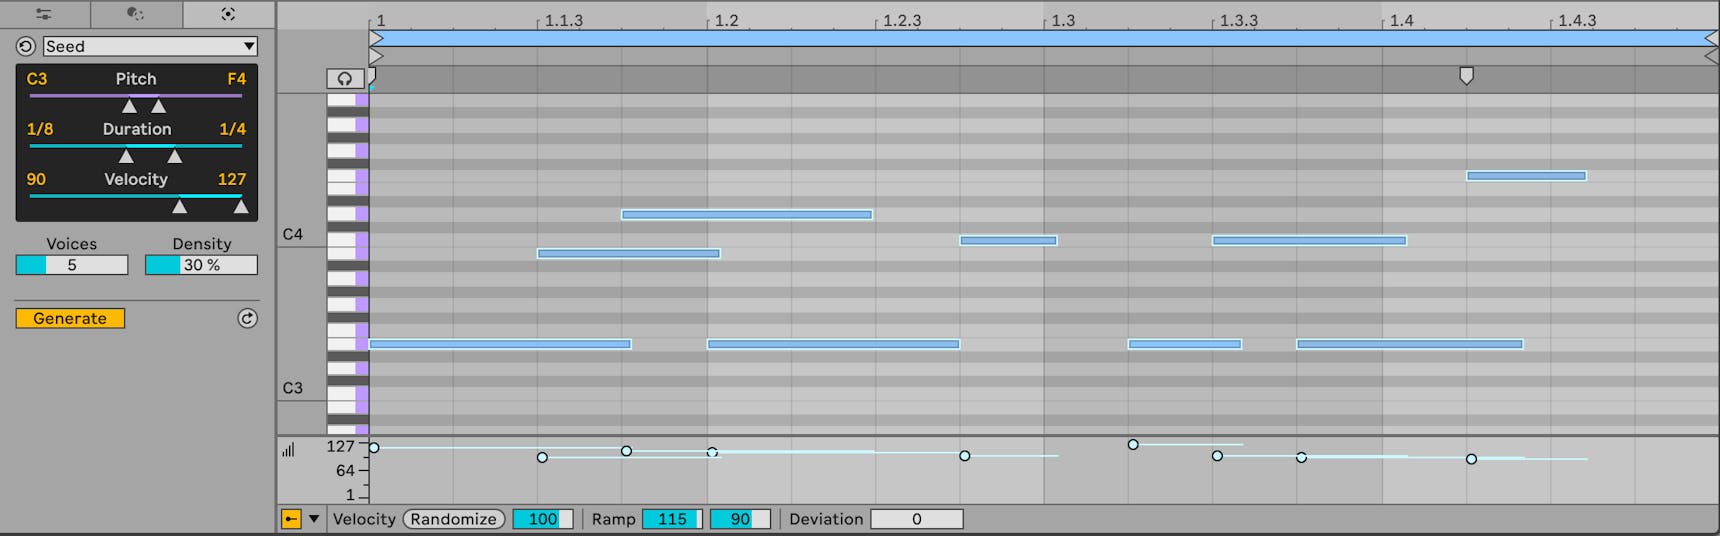
Seed
The Seed MIDI Tool randomly generates notes within specified pitch, length and velocity ranges. Additional parameters allow specifying the number of simultaneous and overall generated notes.
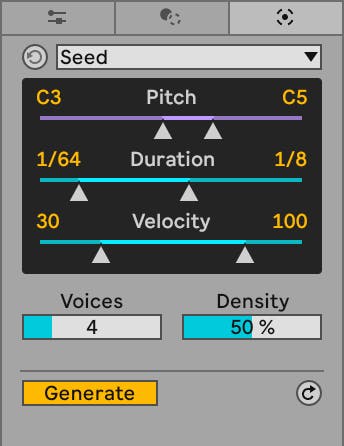
Drag the Minimum and Maximum Pitch or Key Track sliders or the triangular handles in the Pitch Range slider to select the range of pitches within which new notes will be generated.
The Duration and Velocity Range sliders use the same mechanics as the Pitch Range slider.
You can also control the number of notes added using the Voices and Density controls, which allow setting the maximum number of simultaneous notes to be generated
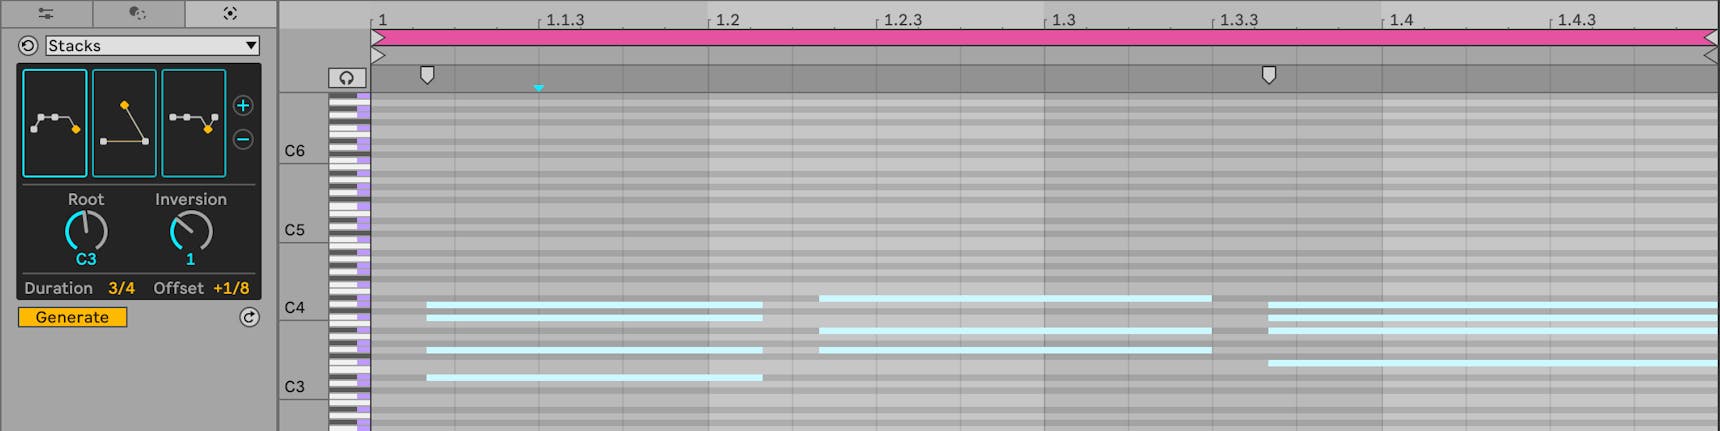
Stacks
Stacks is a MIDI Tool that allows adding individual chords or creating chord progressions within a selected scale. The generated chords fill time selection or the length of the loop if there is no time selection.
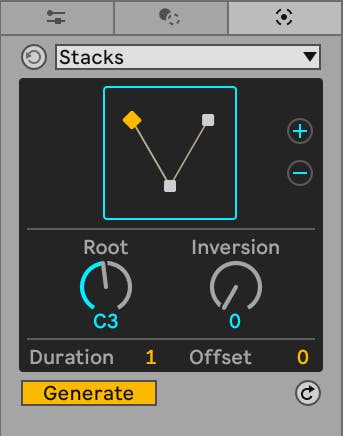
You can select a chord pattern by clicking and dragging the Chord Selector Pad or using Ctrl (Win) / Cmd (Mac) and the up and down arrow keys.
If you want to create a chord progression, use the Add Chord plus button to the right of the Chord Selector Pad/s and select a pattern for the additional chords. Reduce the number of chords using the Delete Chord minus button.
There are 2 ways to set root note. If there is a scale set for the clip, the Chord Root will automatically be adjusted to the root note of that scale
- Use the Chord Root control
- Hold the Alt (Win) / Option (Mac) key and click in the piano ruler to make the selection.
The Chord Inversion knob allows you to rearrange a chord using one of the available inversions.
Chord Duration and Offset can be used to set the length and position of a chord. Both can be adjusted in eighths of the original chord length.

Comments
Post a Comment